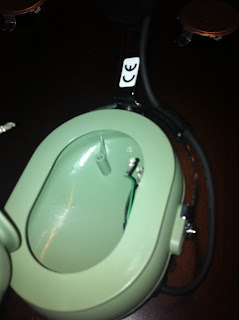
Yesterday I installed an Active Noise Reduction Kit (ANR) to my David Clark H10-13.4 headsets. David Clark is the number seller of passive style headsets. These are the green headsets you see in almost any movie/tv show with an airplane or helicopter. These headsets are build tough. As a matter of fact, so tough that many pilots still own the first pair of David Clark headsets that they purchased many years ago.
Since many of my readers are not pilots, I want to give you a quick background on what headsets are, how they work, and why they are important.
Headsets are devices that aid a pilot in doing 3 things. Provide ear protection from wind and engine noise, listen to the radios, communicate on the radio. There are two main types of headsets, Passive and Active. Passive style headsets work by muffling the sound with sound absorption materials. Active headsets use noise canceling technology to block out the unwanted sounds. Passive Headsets have been around the longest and since they are simple in design, cost the least. That being the case, this is what most pilots start off with including myself.
Bose and Zulu are two of the most popular makers of ANR Headsets. They are extremely expensive ranging from $700 - $1,200. A company called Headsets Inc. actually makes a kit to convert your passive David Clark headsets to ANR headsets. I was very skeptical at first, however after doing research I couldn't find one bad review on the product.
The product comes in two flavors, self install or factory install. Along with that there are a host of other upgrades such as auto battery shutoff, upgraded cabling etc. Me being me, and one who likes to save money, I chose the self install option, the auto battery off upgrade, and the upgraded cabling. I detailed the installation below.
The kit comes with everything in the picture below.
Temperfoam insulation, 3-in-one cable, new crossover cable, battery box, anr modules, and some instructions and wiring diagrams.
The first step is to remove your existing ear seals. The kit requires either gel ear seals in a new or like new condition. Foam ear seals will not work as they do not provide a proper seal. If you are installing these on an old headset you may want to consider this a good time to replace those old worn out foam earseals with new gel seals.
The next step is to remove the speaker coverOnce the speaker cover is removed you will see some acoustical foam. Remove that foam to reveal two screws that hold the speaker to the ear cup. Remove those 2 screws to remove the speaker.
Carefully remove the existing speaker to reveal the guts. This can look pretty intimidating at first, but take your time and familiarize yourself with the wires, and refer to the diagrams if you get confused. Remember their are basically 3 wire coming in, the mic, crossover, and plug wires.Repeat the process for the other cup. Remove the speaker and disconnect the leads.
It's a good idea to find a dvd case to use a spreader to give you some room to work with. Cut your existing jack cables, and crossover cables. I chose to leave as much wire as possible to give me more room to work with.
Install the new crossover cable, and new jack cables. Use the zip tie to keep the jack cables from slipping out. If you look closely at the picture you will see it. The next step is to solder your connections per the wiring diagram. If you don't have experience soldering get some old speaker wire and practice. It's pretty easy once you get the hang at it.
Trim the wire tie back neatly.
As you continue to solder don't forget to put the wire wrap on first. Oops, I made that mistake a few times. It's no big deal though, just simply undo your solder and try again. Use a cigarette lighter to get the shrink wrap to shrink.
Now is the time to install the final connections. You must connect the new wires to the new ANR Circuit boards. This is something that if you have never done before, I recommend taking a few lessons on youtube on. It's still a simple process, but certain techniques must be followed to prevent you from burning up your brand new $160 silicon wafer. The trick is to make sure you tin your wires first, and get a fat bead of solder on the circuit. Just be careful that you don't burn a whole in it, or touch another tracing and you should be just fine.
Finally apply the double sided tape, install the original insulation that fits in the deepest portion of the cup, then install the new pink temperfoam.
Take note of which cup you want to be your left, and which cup you want to be your right. Each cup is marked and it's important for the microphone positioning that are inside your cup. This is the only downside if you like to switch which side is your left or right often. So make sure you decide before you begin installation.
VOILA!!! You are all done!!!!
This mod sounds AMAZING. I tested them out this morning for breakfast. I decided to fly to 4I7 (Greencastle/Putnam County). They have a $5.99 all you can eat breakfast buffet. Yummy. The ANR makes a world of a difference. I wonder how I flew before I had these. God willing, I will never fly without ANR again. For anyone who is on the fence about getting this kit, GET IT!!! If you have basic wiring skills, or have installed a car radio before, save yourself the $50 and install it yourself. If not the folks at Headsets Inc. will install your ANR for you.


